 Chapter 1 - Installation Chapter 1 - Installation
1.1 Program description
1.2 System requirements
1.3 Installation
1.4 Activating a new license (GUI)
1.5 Starting NeurDeblur
1.6 Initial settings at first program start
1.7 Environment and system variables
NovoDeblur is a versatile tool for deconvolution and post-processing of 3D image stacks acquired through light sheet, confocal, spinning disk, or brightfield microscopy. The software supports both synthetic (computed) and measured point spread functions (PSFs) for deconvolution. Users can operate the software via the graphical user interface (NovoDeblurGUI) or through a command line window using the NovoDeblur command line tools. NovoDeblur GUI serves as a launcher for various deconvolution tools tailored to different imaging modalities (e.g., light sheet, confocal, or brightfield microscopy) and offers additional features for visualizing and post-processing deconvolved images.
NovoDeblur is designed to handle extremely large 3D microscopy stacks, particularly those acquired via light sheet microscopy, which can reach sizes in the hundreds of gigabytes. To manage such large datasets, the software automatically splits them into blocks, deconvolves them sequentially, and then stitches them back together. The deconvolution algorithm in NovoDeblur is highly efficient, with GPU acceleration on modern NVIDIA graphics cards. On a PC equipped with a fast NVIDIA graphics card commonly used for gaming and priced between $500-$1000, the software can process more than one billion voxels in about 10 minutes.
The graphical user interface (NovoDeblur GUI) supports batch processing of image stacks. Users can set a start time for processing a job list with an integrated timer, allowing deconvolutions to run overnight when the computer is not needed for other tasks. New deconvolution jobs can also be added to the job list that is currently being processed, ensuring a continuous workflow in daily lab routines.
NovoDeblur GUI includes several plugins, such as one for stripe artifact reduction in light sheet microscopy data using directional frequency filtering, as well as plugins for image post-processing via contrast-limited adaptive histogram equalization (CLAHE) or unsharp masking. The color combiner plugin allows users to merge multiple monochrome image stacks recorded with different color filters into a single stack of color images. This module supports additive color mixing for fluorescent dyes as well as subtractive color mixing for simulating light-absorbing stains. Predefined default color maps resembling HE and IHC stainings are included with the software.
NovoDeblurGUI supports the inspection of images in two synchronized display windows, one for the deconvolution results and another for the corresponding raw data. In addition to slice-by-slice representation, maximum intensity projections (MIP) along the three principal directions can be generated from both deconvolved and raw image data.
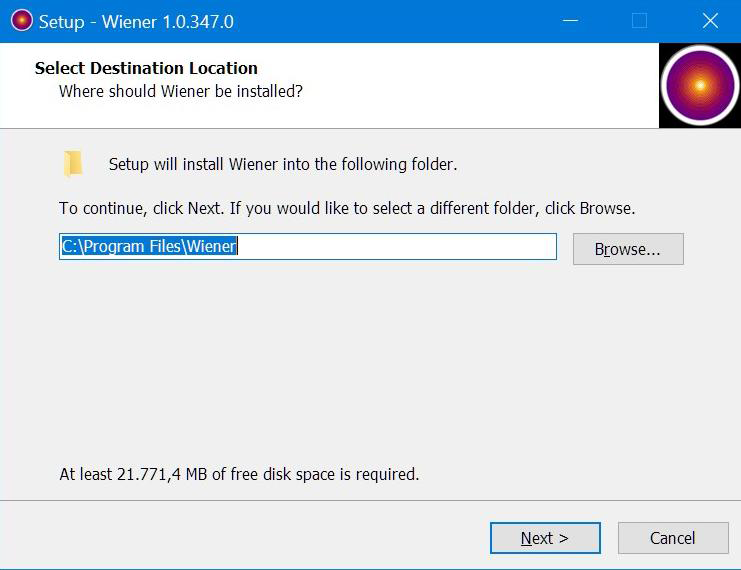
Figure 1.1 After starting setup.exe, the installer opens and guides you step-by-step through the installation process. The installer supports customizing the installation path and choosing whether a start icon should be created on the desktop. A reboot is required after the first installation of NovoDeblur, but is usually unnecessary if updating an existing installation.
Upon the first launch of the graphical user interface (NovoDeblur GUI) or any of the command line tools, a license activation dialog will appear. Please copy the 'site code' and the 'MID code' (both highlighted in red in figure 1.2 and email them to klaus.becker@tuwien.ac.at For your convenience, you can press the button labeled "Request demo license" instead. Your default email program should then open a template email with the recipient address, the 'site code' and the 'MID code' already entered. In response, you will typically receive an activation code within 24 hours.
After receiving your activation code, please restart NovoDeblur and paste it into the 'activation code' field, then press 'continue'.
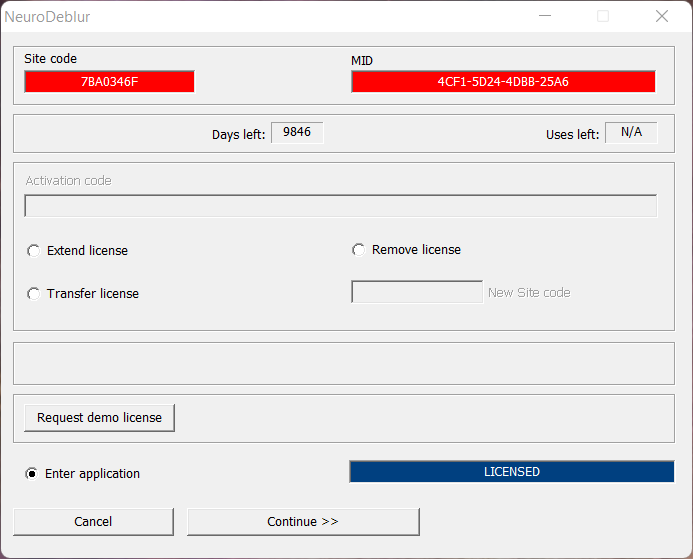
Figure 1.3 Upon the first launch of the graphical user interface (NovoDeblurGUI), a license activation dialog appears, displaying the 'site code' and the 'MID code' (both highlighted in red). Please click the "Request demo license" button to send these codes to us and receive a 14-day demo license. Alternatively, you can send this information directly to klaus.becker@tuwien.ac.at. You will receive an activation code in return, which you will need to enter in the activation code field and then press the Continue button to activate your copy of NovoDeblur.
NovoDeblur can be operated using the GUI, or the different deconvolution tools can be run directly within a console window:
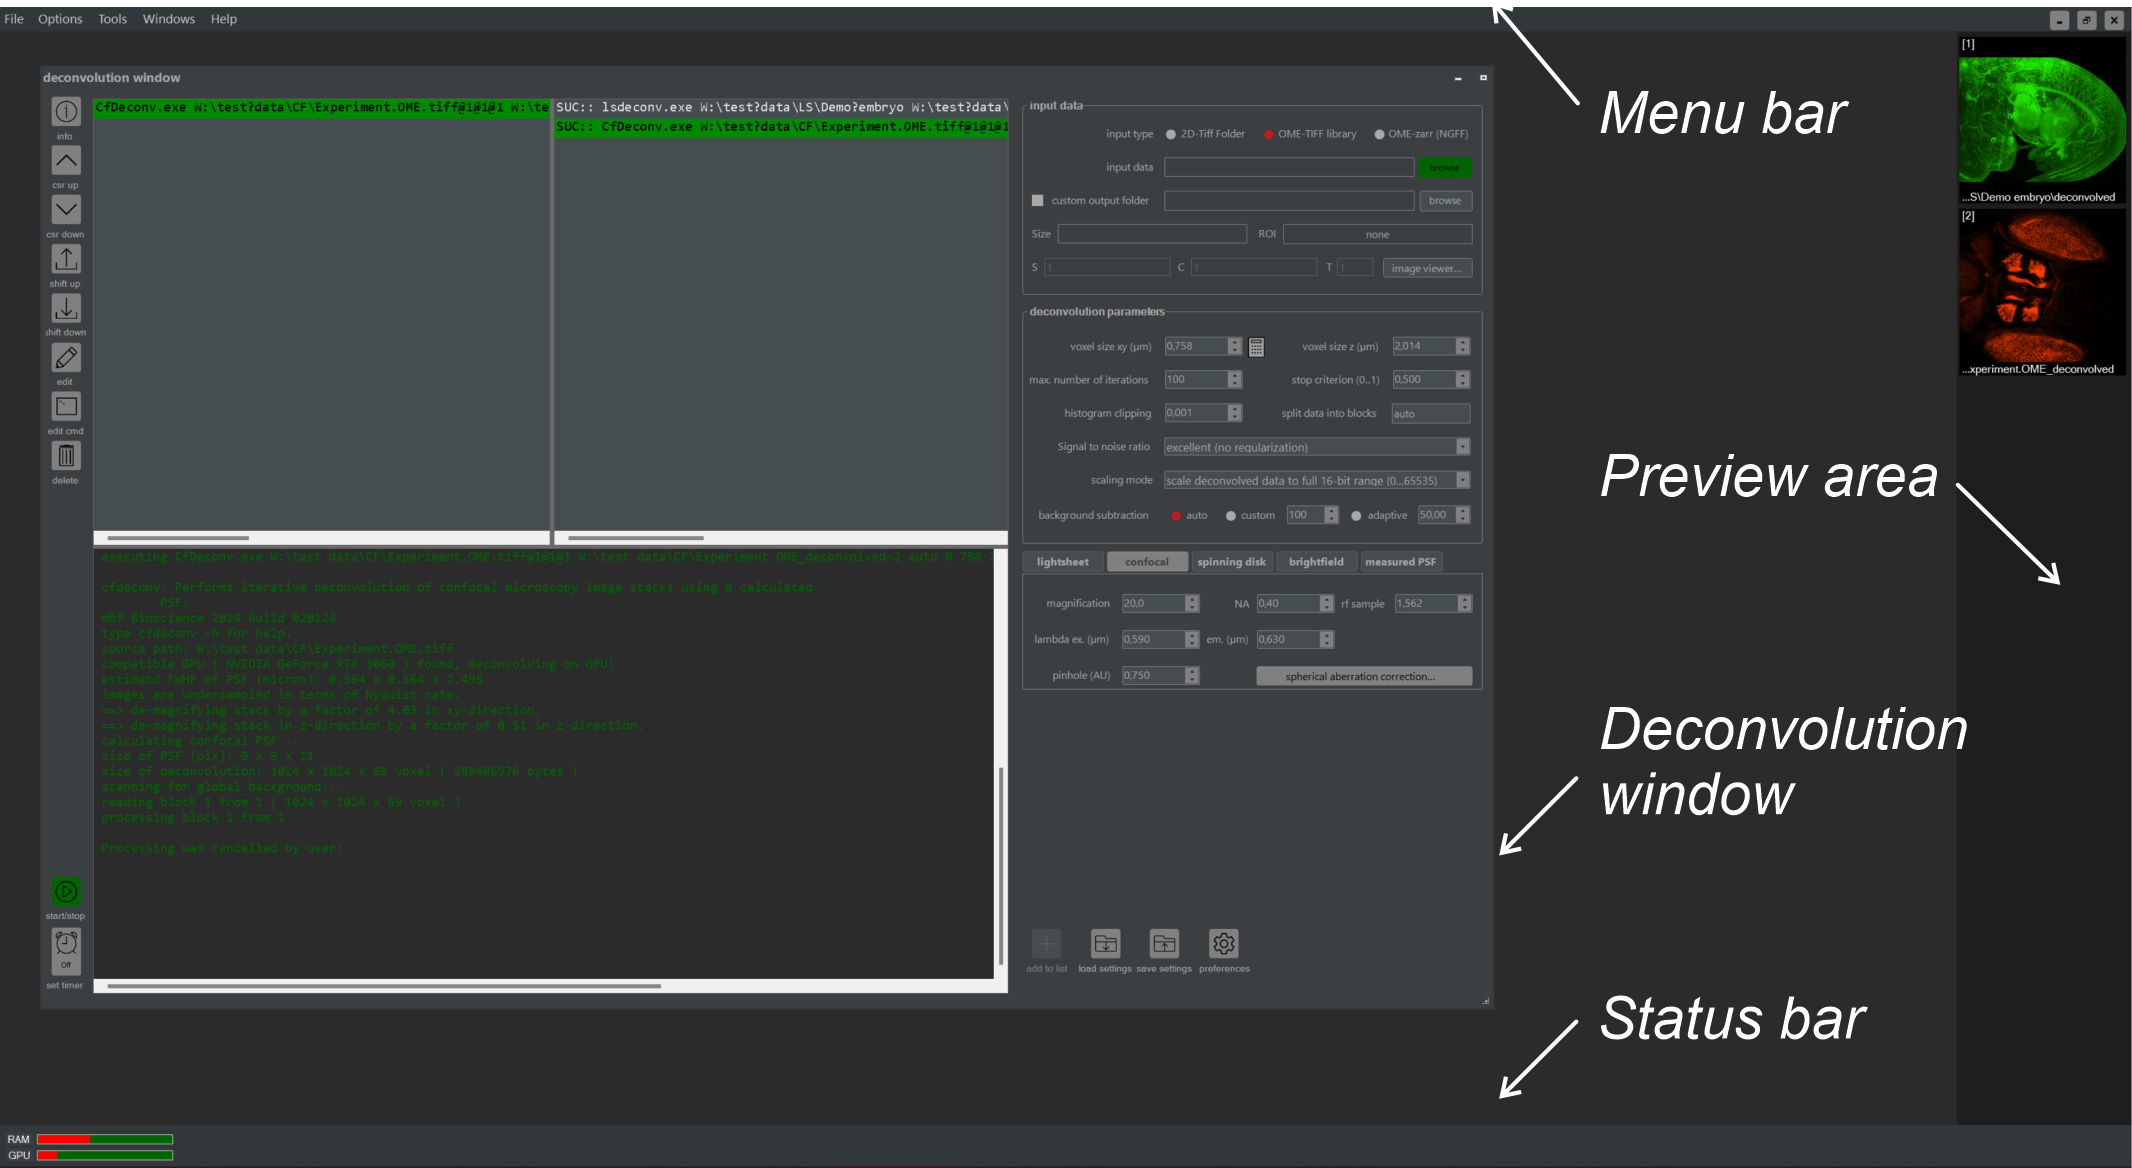
Figure 1.3 Overview of the NovoDeblur GUI window. All functions for deconvolution, post-processing, and visualizing image data are accessed from here.
Upon the first launch of the program, a dialog box will appear, asking if you would like to perform an automatic compatibility check for your graphics card (figure 1.4). Selecting "Yes" will initiate the test procedure, while selecting "No" will skip it. If the compatibility test is successful, the program will prompt you to activate GPU-accelerated processing by default. This setting can be modified later in the preferences dialog window. Note: The initial compatibility test only checks the first graphics adapter found (GPU0). If your computer has more than one graphics card, you can check and activate these additional GPUs from the preferences window.
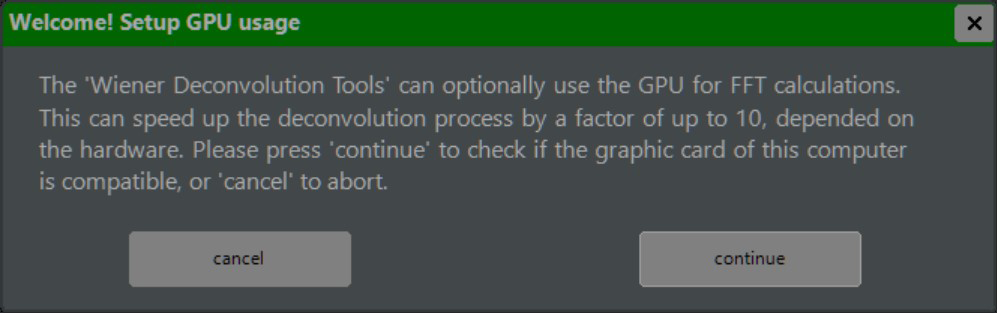
Figure 1.4 GPU Compatibility Check. During the first program launch, a dialog window will ask if you want to perform an automatic compatibility check for your graphics card. Select Yes or No using the corresponding buttons.
After the initial setup, the NovoDeblur GUI window will open after a short delay. Chapter 2 describes how to use NovoDeblur GUI for scheduling, running, and inspecting your deconvolutions.
The installer creates a system-wide environment variable named NovoDeblurPATH. This variable points to the installation directory of NovoDeblur, usually C:\Program Files\NovoDeblur. If this variable was not created during installation, it can be set manually later. The environment variable is used by NovoDeblur to locate necessary software components such as lookup tables, templates, or default settings. To manually set or modify system environment variables on Windows 10 or Windows 11, follow these steps:
NovoDeblurPATH" as the variable name and the installation path of NovoDeblur as the variable value (usually "C:\Program Files\NovoDeblur"). Then click "OK".A reboot may be required to activate the changes made.